
Look under your desk and you will probably find the same scene as in most home offices: a nest of black cords tangled around a power strip on the floor, dust collecting in the loops, and no clear idea which plug belongs to which device. It looks bad, it makes cleaning awkward, and the day something stops working or needs moving, you face ten minutes on your knees pulling at cables that all feel identical.
The good news is that cable chaos is one of the easiest office problems to fix permanently, because cables do not multiply on their own. They tangle because they are too long, unlabelled and left to find their own routes. Give them a planned route, shorten the slack, and label both ends, and the mess under your desk can disappear in a single afternoon and stay gone.
Quick Answer
To fix cable chaos under your desk, unplug everything, identify each cord, and rebuild the setup around one power strip mounted off the floor, either under the desk or in a cable tray. Bundle each device’s cord to the right length with reusable ties, route cords together along the back of the desk, and label both ends of every cable. Keep one charging cable reachable on the surface and store all spare cables coiled in a box or drawer.
- One power strip, mounted off the floor, is the heart of a tidy setup.
- Most tangles are just spare length; bundle the slack instead of letting it hang.
- Labels on both ends turn future troubleshooting into a ten-second job.
- Cords should run along the desk’s back edge, never dangle in loose loops.
Step One: Start From Zero
Resist the urge to tidy the tangle as it is. Switch everything off, unplug every cord from the power strip and from each device, and take the whole nest out from under the desk. Vacuum the dust while the space is empty; this is the one benefit of the mess, a clean floor under the desk.
Now lay the cables out and identify each one. A typical desk runs more than people expect: monitor power, laptop charger, lamp, phone charger, speakers, an external drive, a desk fan or heater, and chargers for smaller gadgets. Count them. Any cable that belongs to a device you no longer use leaves the office today. Any spare or duplicate charger goes into a labelled box or drawer, not back into the nest. In most offices this step alone removes a quarter of the cables before you organise anything.
Step Two: One Power Strip, Off the Floor
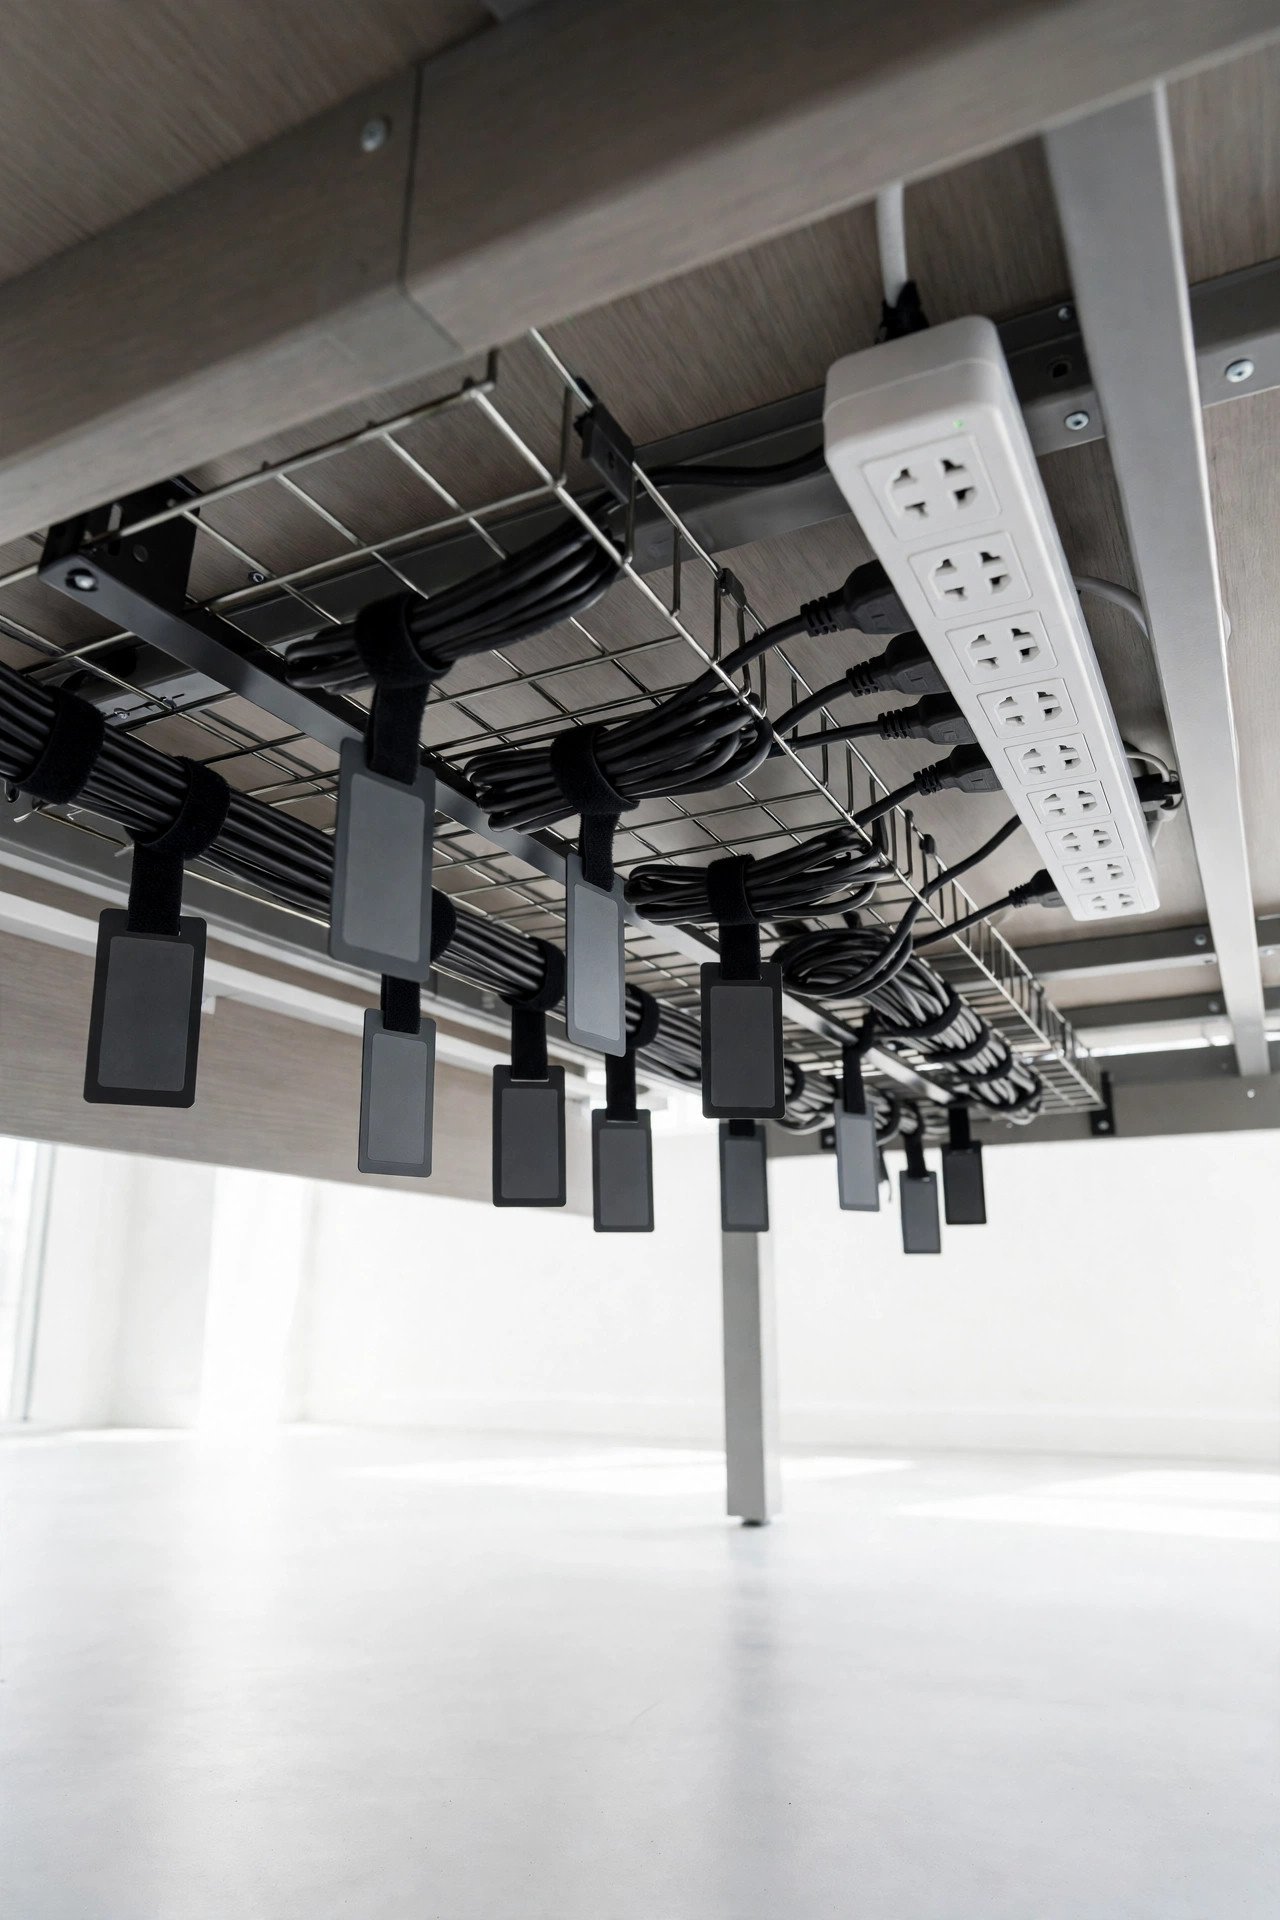
The single biggest upgrade is moving the power strip off the floor. Mount it under the back edge of the desk with screws, strong adhesive strips or the brackets many trays include, or place it inside a cable management tray fixed under the desk. Off the floor, the strip stops collecting dust, your feet stop knocking plugs loose, and cleaning under the desk becomes a quick sweep instead of a negotiation.
Plug devices back in one at a time, starting with the ones that never move, such as the monitor and lamp. Leave one or two sockets free for temporary things like a charger for a household gadget, so guests and occasional devices do not force you to start a second strip on the floor. A wider system view helps here: cables behave best when they are planned as part of your whole desk storage system that stays tidy, with every cord given a route the same way every object is given a home.
Step Three: Shorten, Bundle and Route
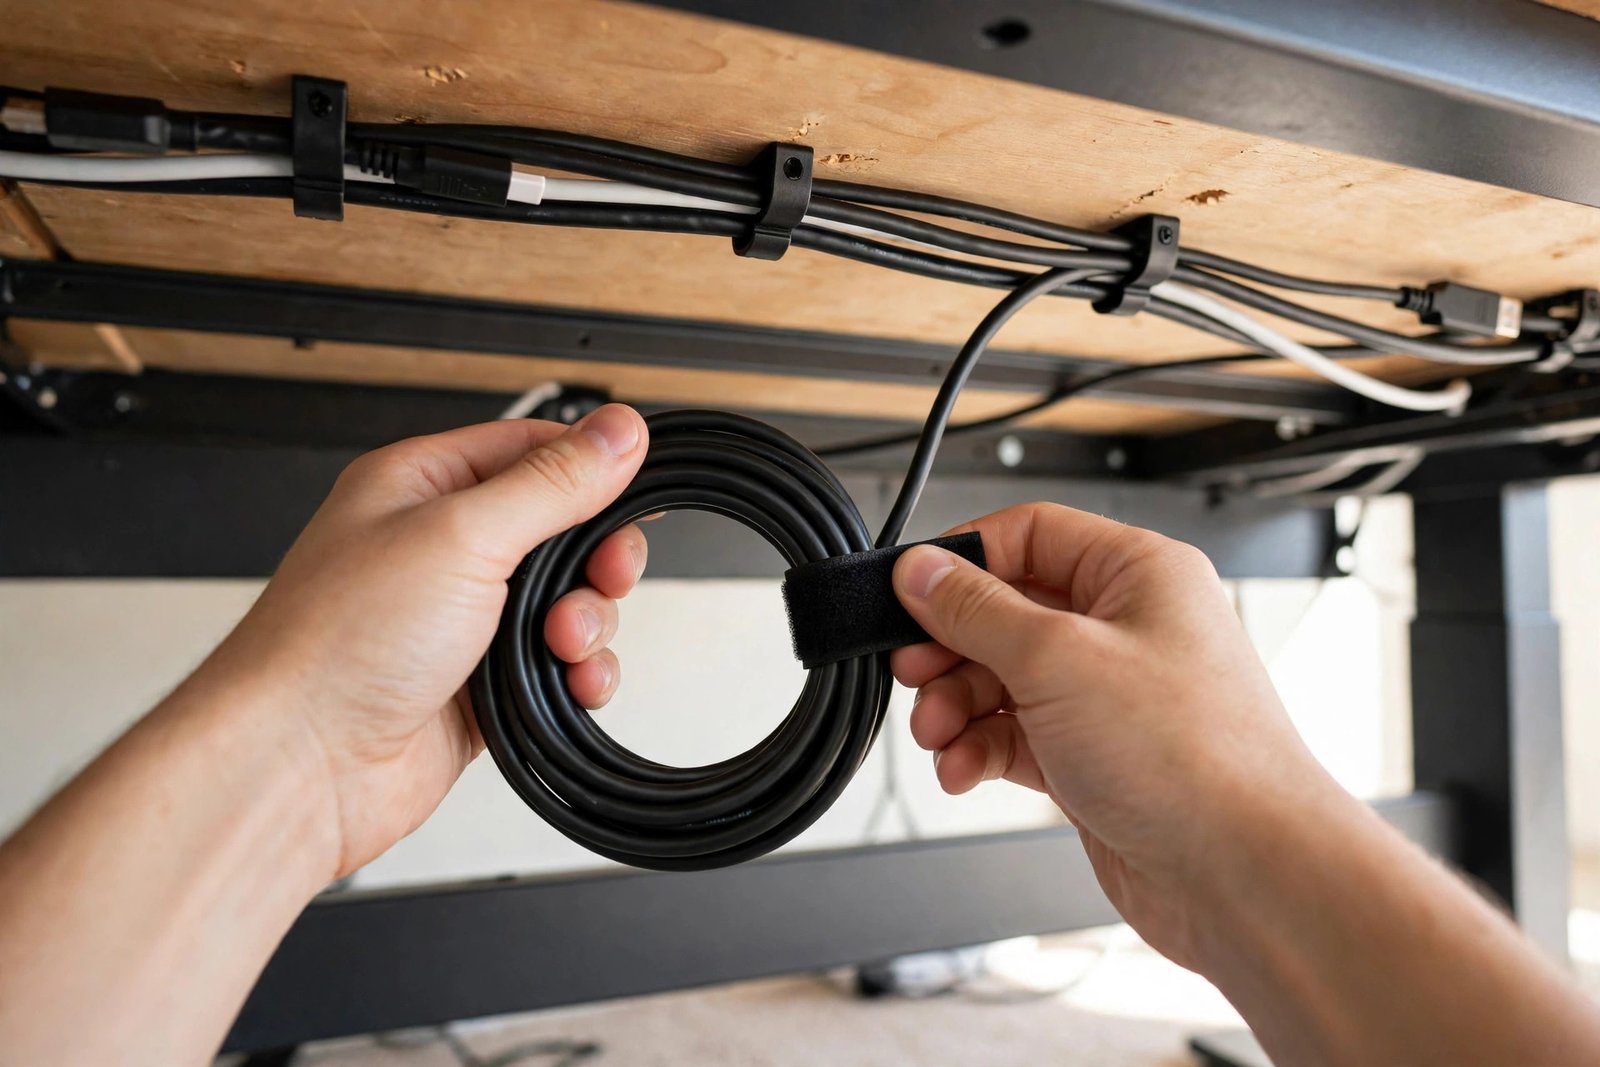
With the strip in place, deal with length. Most cords are far longer than the distance they travel, and the excess is what tangles. For each device, run the cord along its intended route, gather the spare length into a neat loop, and secure it with a reusable hook-and-loop tie. Avoid tight kinks; a loose loop about the size of your hand keeps the cable healthy and the bundle compact.
Route cords in groups along the back of the desk: power cords together toward the strip, and the data cables, such as the monitor’s display cable, running beside them to the computer. A cable tray under the desk hides the bundled runs completely. If your desk has no tray, adhesive clips along the underside of the back edge will hold the runs in place nearly as well. The goal is that from your chair you see no dangling loops, and from above you see no cables on the surface at all except the ones that must move, like a laptop charger.
Give the laptop charger special treatment
The laptop charger is the cord people unplug and replug most, so it should not be buried in the tray. Route it so the plug end rests in one fixed spot at the back of the desk, clipped in place so it cannot slide down behind the desk when unplugged. That one small clip ends the daily fishing expedition behind the furniture.
Step Four: Label Both Ends
Labelling sounds excessive until the first time you need it. A small piece of tape or a simple tag near each end of every cord, marked with the device name, means you never again unplug the monitor while aiming for the lamp. It also makes the full tidy faster next time, because sorting labelled cables takes minutes. Labels matter most for the near-identical black power bricks that every office accumulates for laptops, monitors and drives.
Step Five: Keep the Floor and Feet Zone Clear
Finish by checking the space where your feet and chair wheels live. No cord should cross that area. Run any cable that must reach a wall socket along the back wall or behind the desk legs, secured with clips so it hugs the skirting board. If your setup sits in a room corner, plan these runs together with the layout of the whole workspace; the positioning advice in our guide to a small home office in a corner shows how much easier cables behave when the desk sits close to the sockets in the first place.
Finally, decide where spare cables live. One box or drawer, cables coiled individually and tied, each labelled. The day you need the spare camera cable, you will take it out, use it, and return it, and the under-desk zone stays untouched.

Mistakes to Avoid
- Tidying the tangle without unplugging. You cannot shorten or reroute cords properly while they are live and connected.
- Leaving the power strip on the floor. It collects dust, gets kicked, and invites every new cord to join the pile down there.
- Using tight single-use ties everywhere. The first change you make turns into cutting and waste; reusable ties adjust in seconds.
- Bundling every cable into one giant rope. One fault then means dismantling everything; keep power and device groups separate.
- Forgetting the charger you use daily. If the everyday charger is hard to reach, you will leave it loose on the desk and the mess restarts there.
- Skipping labels because “I’ll remember”. In six months, every black brick looks the same. Label them now.
Frequently Asked Questions
Is it safe to put a power strip in a closed cable box?
A vented cable management box designed for the job is fine for a normal desk load of chargers and small devices. Leave space around the strip, do not pack the box tightly with coiled excess cable, and never cover a strip with fabric or paper. If a charger runs hot to the touch, give it open air instead.
How do I manage cables with a height-adjustable desk?
Leave one generous loop of slack between the desk and the wall or floor, gathered so it hangs in a single smooth curve, and check the full range of movement before tying anything off. The strip should be mounted on the desk itself so it rises with it, leaving only one cable running down to the wall socket.
What do I do with a cable that is far too long?
Bundle the spare length into a loop secured with a reusable tie and park the loop inside the cable tray or behind the device. Never cut a power cord to shorten it; adjust only with bundles, or swap in a shorter cable of the same type if you have one.
How often does cable management need redoing?
Almost never, if the system is built properly. Add a new device by following the same routine: right-length bundle, route along the back, label both ends. Offices that treat cables as a one-off chore stay tidy for years; a small office with no storage benefits most, because hidden cables create calm where there is no room for visual noise.
Conclusion
Cable chaos is not a character flaw; it is just cables with no plan. Start from zero, mount one power strip off the floor, bundle every cord to its true length, route the runs along the back of the desk, and label both ends. The result is an under-desk space you can clean in seconds, plugs you can identify at a glance, and a desk that looks as calm below the surface as it does on top.
1 thought on “Cable Chaos Under Your Desk: How to Hide and Organise Cords”